Creating a FloPicTime gallery
So, the plugin is installed and activated and your site is connected with Pic-Time account. It’s time to create your first gallery!
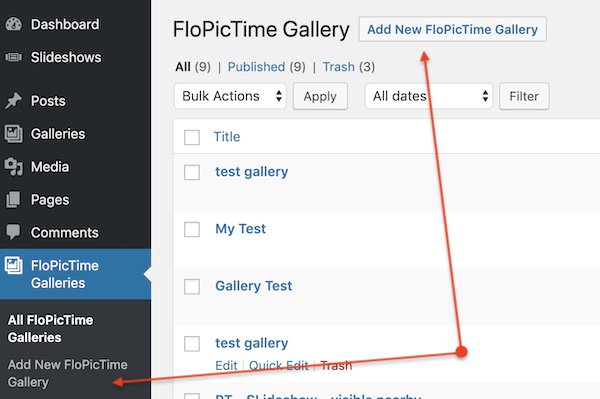
In order to start creating the new gallery, you can either click Add New FloPicTime Gallery in the sidebar or click Add New FloPicTime Gallery above the galleries list on All FloPicTime Galleries page.
Please check the video overview of the whole process or read the steps below:
Step 1 :: Selecting a project
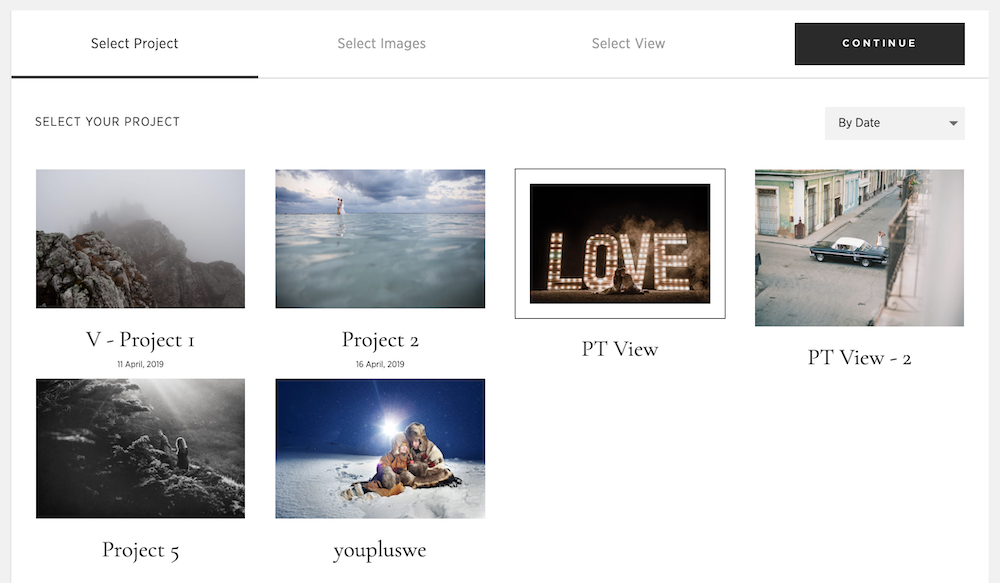
Since your site is connected to your Pic-Time account, on Select Project step you will see your projects synced with Pic-Time. Select one of the projects and click Continue.
In case you do not see all Pic-Time projects because you added some new project recently, go to the FloPicTime Settings page and click the Sync button.
Step 2 :: Selecting the images
At Selecting Images step you will see the content of your Pic-Time project, selected at the previous step. If the project is split by scenes, you will see them here as well.
By default, all the images from the project are selected. If you want to add less images to the gallery, you can unselect all and select what you require. The same Select All option is available for each scene individually.
In case you select images manually, the frame around the image will indicate if an image is selected. There is also counter above the image that will display how many images of the total are selected.
When you are done with the selection, click Continue to move on to the next step.
Step 3 :: Selecting a layout
Now it’s time to select a layout for your gallery. Depending on the version of the plugin that you use – free or full – you will be able to apply different layouts. You will have access to all layouts and you can see how the gallery looks with any of them, however, the free version will request an upgrade in case you are trying to apply a layout from full version.
Layouts:
1. Stacked layout
This layout will display the images as a list.
Additional options to manage – padding above and below the gallery, padding to the left and right of the gallery, space between the images.
At the top right you can find a reorder option that will open a popup allowing you to reorder the images in the gallery. Option to manage image Alt and Title for SEO is available in premium account.
2. Grid layout
This layout will display the images as a masonry grid.
Additional options to manage – padding above and below the gallery, padding to the left and right of the gallery, number of grid columns, space between the images in the grid.
At the top right you can find a reorder option that will open a popup allowing you to reorder the images in the gallery. Option to manage image Alt and Title for SEO is available in premium account.
3. Slideshow layout
This layout will display the images as a slider (with 2 layout options).
Additional options to manage – padding above and below the gallery, loop on/off option, slider style where you can have the images slide by one or see more than one image at one time, navigation arrows options. In case you selected single images slider – you will see the option to select transition type and the slider height on desktop (on mobile it will adjust to the screen). If you selected Visible Nearby slider – you can manage the space between the images and slider height both on desktop and mobile.
At the top right you can find a reorder option that will open a popup allowing you to reorder the images in the gallery. Option to manage image Alt and Title for SEO is available in premium account.
4. Pictime layout
This layout will display the images using the same layout that is selected for this project in your Pic-Time account. It will reflect enlarge images if you have them select in Pic-Time gallery. The reorder option is not available for this layout since the layout is built per a different algorithm rather than a direct order.
Additional options to manage – padding above and below the gallery, padding to the left and right of the gallery.
Option to manage image Alt and Title for SEO is available in premium account.
Step 4.a :: Adding the gallery to a post or page with a shortcode
Your new gallery is ready and you can publish it.
When the gallery is published, you will see a field with a shortcode and Copy button. Click it to copy the shortcode and now you can go to any page or post and insert it into the page or post content.
The created gallery is available for you on All FloPicTime Galleries page and you can open it and get a code at any moment when you require it.
Step 4.b :: Adding the gallery to a post or page with a shortcode using Gutenberg
If you are using Gutenberg Editor in WordPress, you can skip the shortcode step from above and just insert the gallery using a Gutenberg block that we built for you.
Add a new block and select PicTime Gallery. It will automatically insert the most recent gallery. However, in the sidebar to the right, you have a list of all galleries and can select the required one.
Editing the existing FloPicTime gallery
After you created a gallery and even added it to a post or page, you can always tweak it if you want. You just open the gallery in a list on All FloPicTime Galleries page and open the step you require to change – like adding more images to the gallery or removing some of them, changing the layout, reorder image and so on. The gallery shortcode will remain unchanged so you do not need to reapply it to the post or page. Just save the update when you finished and see the updated gallery on the page or post you initially added it to.