FloForms Tave Integration
The following article explains how to set up our Tave WordPress Integration with our Flo Forms Plugin. For this extension to work you’ll need to first have installed our Flo Forms plugin. If you are a FloForms Pro user, you have access to download the plugin from your Flothemes download account as part of your Pro membership. If you are a FloForms free user, you can purchase the FloForms Tave plugin here.
Installation
If you are a Pro user, download the plugin from your downloads section in your account page. If you are a free user, purchase the plugin first, and download it from your user account page. Once downloaded you’ll have a .zip file named Flo Forms Tave Integration.

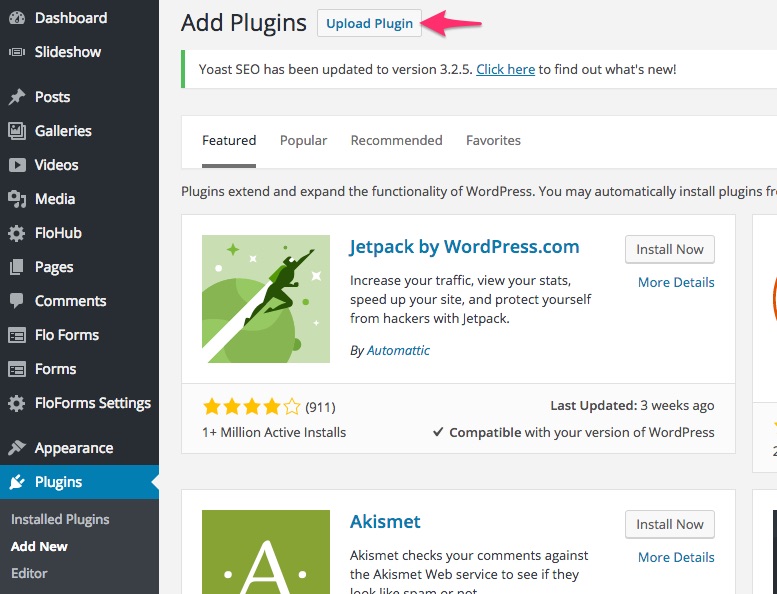
To upload the plugin, go to your WordPress admin panel, go to plugins, and “add new”, then “upload plugin”:
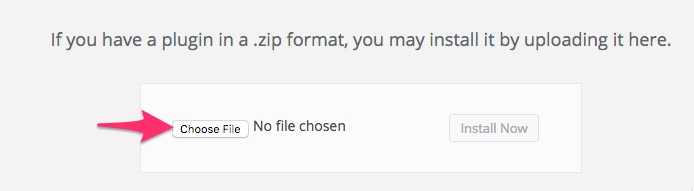
From here you can select your plugin, or drag and drop it into the choose file section, and then hit install now:
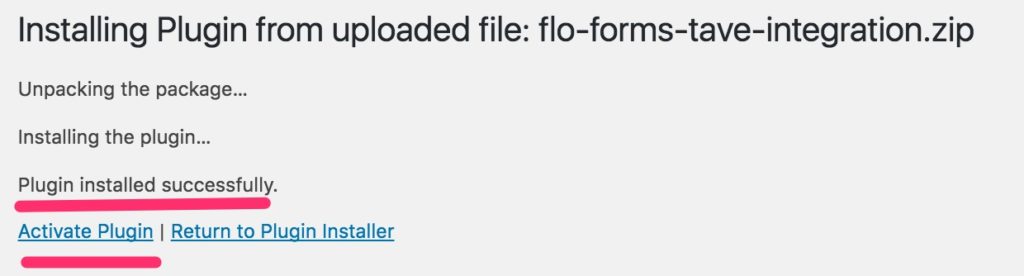
Once its uploaded activate the plugin:
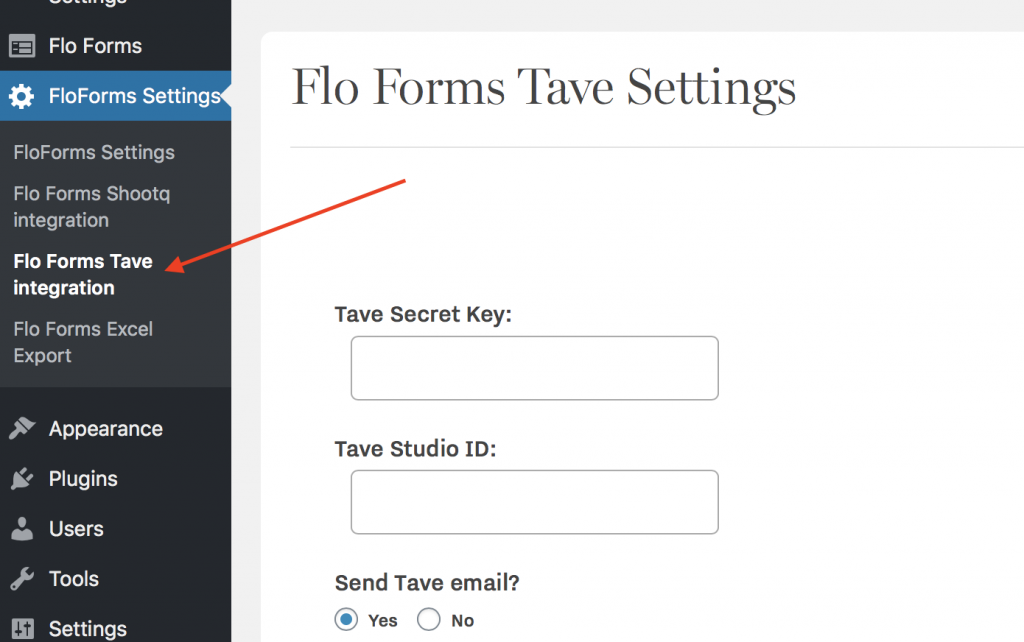
Now the plugin is activated, you will have a new settings option in the Flo Forms Settings area.
Connecting Flo Forms and Tave
Now that you’ve activated the plugin, and created your Flo Form you’ll want to link your form to your Tave account, and then you’ll want to map your fields to relevant fields in Tave.
Tave API Access Key
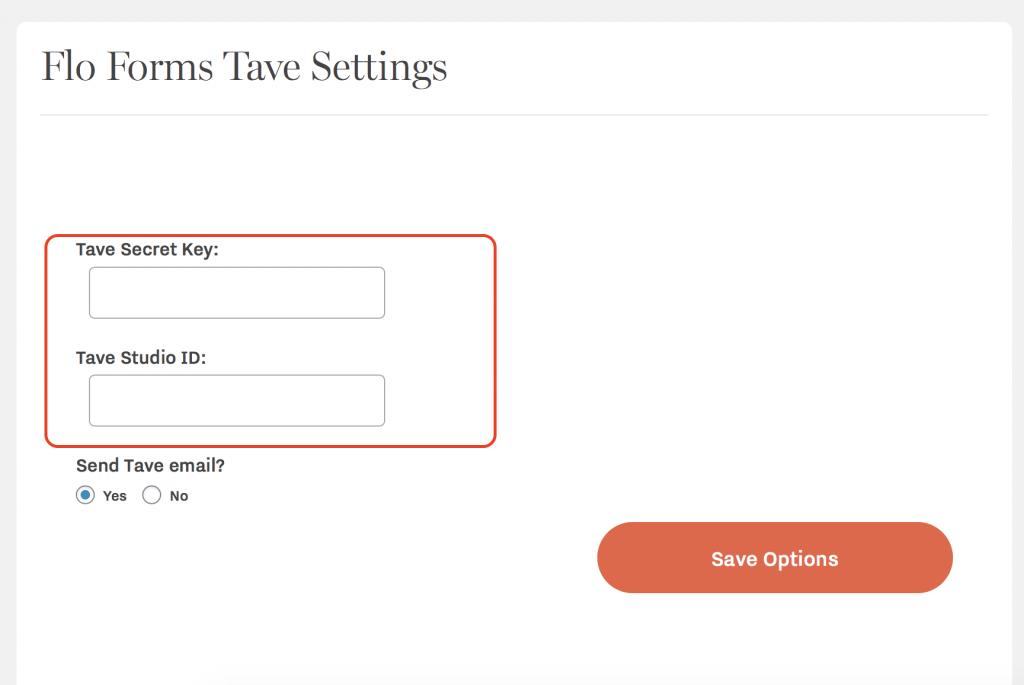
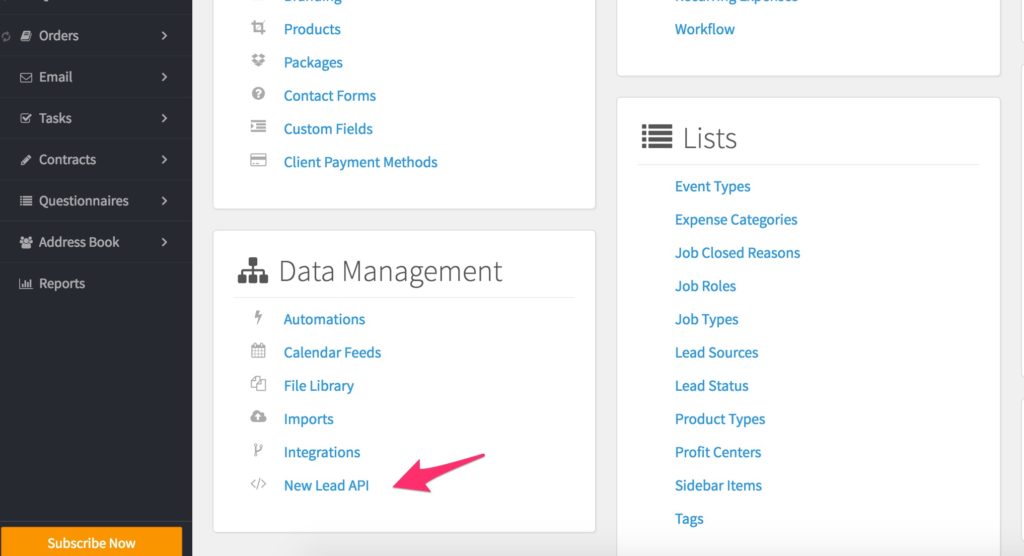
To get your Tave access key and Studio ID, login to Tave and go to Settings › New Lead API.
Key and Studio Alias.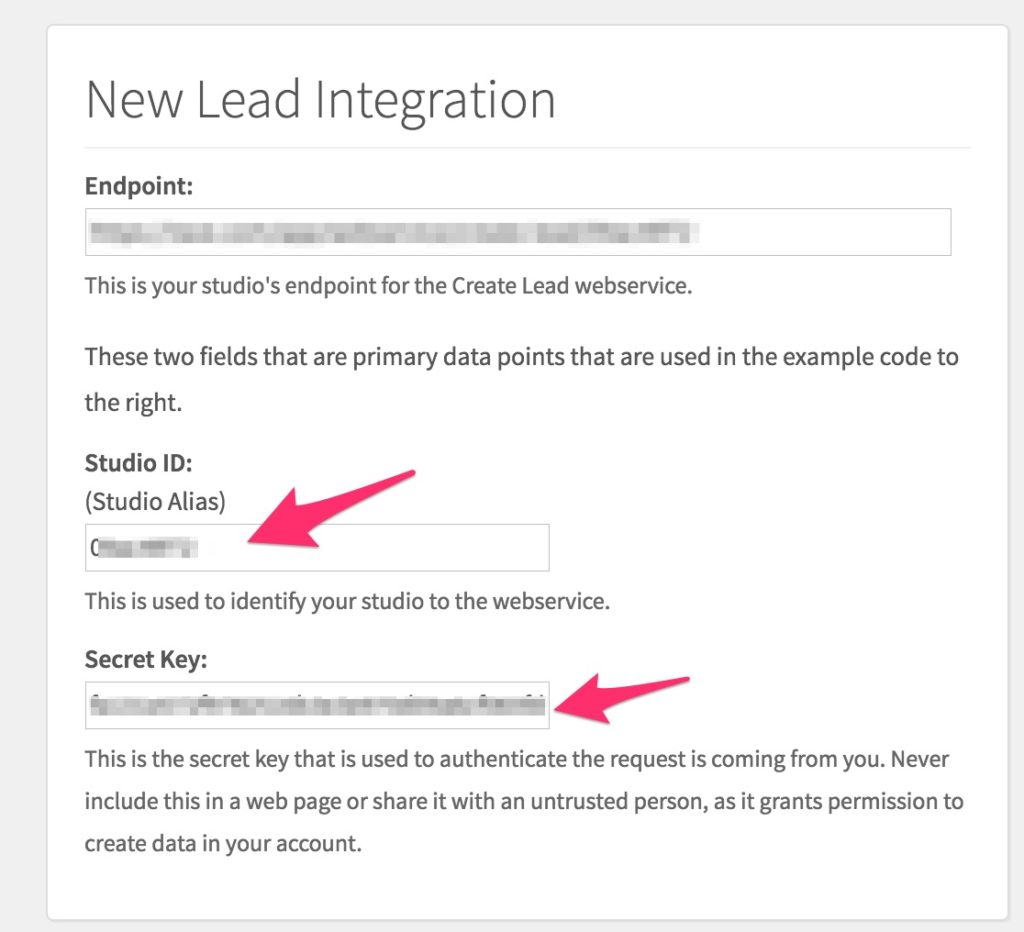
Once you’ve entered the key and studio ID, save options.
Mapping Fields
Finally, you’ll want to map the relevant fields in your form to link to fields directly in your CRM fields. For fields that aren’t mapped, they’ll be added to the notes section in Tave. To do so is simple:
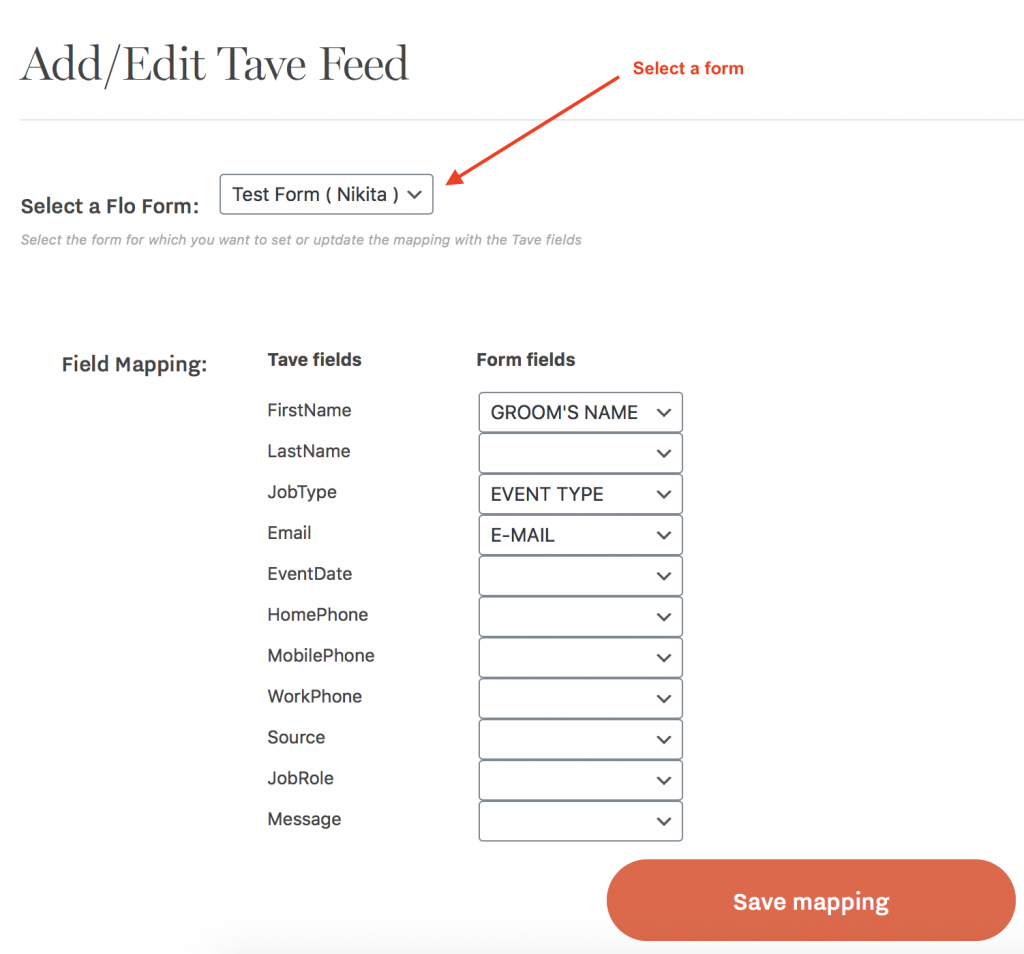
Step 1. Select Form
First choose a form that you want to map, then you’ll have all the options available to map:
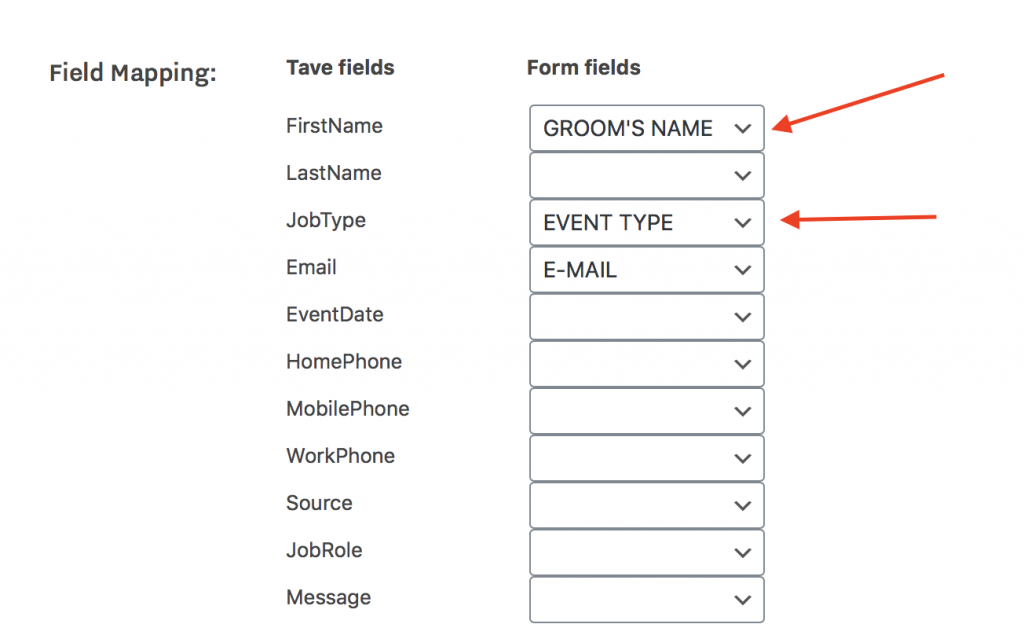
Step 2. Map Fields
Next select the options you want to map to the relevant shootQ fields, NOTE! Email is required, Job Type is also a very useful field:
Step 3. Save and Test
Save the mapping options on the right-hand side. Then go to your contact page and test the form. You should now be receiving inquiries as new leads in Tave.
Hidden Fields
We’ve added the option to include hidden fields in your forms. This is great for setting information about the clients without user input. Its generally used for job type, job role, or brand only when you know the form is specifically for this.
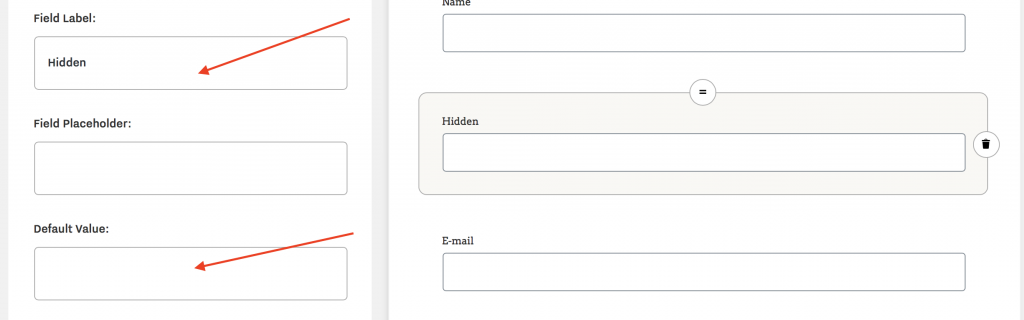
To add a hidden field, go to the FloForms plugin admin area, then to the contact form, then in “Add a Field” you can select “Hidden”.
Then select the field, give it a label, this should relate to the fields in Tave API, they don’t have to match exactly (JobRole, JobType, Brand), and assign the default value. For JobRole this may be “Bride” or JobType could be “Wedding” for example.
Once created and values entered, go back to the FloForms Tave integration section in FloForms Settings, and map the required hidden fields.
Now your hidden field values will populate with your Tave submissions.