Slideshow in Flex (Detailed Overview)
We're excited to introduce a new and long-awaited element of the Flex editor - Slideshows! Just like Tabs, Slideshows present the visitors of your website with a more dynamic visual experience. While they do require a slightly more complex setup, Slideshows unlock a new level of creative freedom for you to enjoy.
In this article, we'll take a closer look at each setting, as we explore it through your dashboard. Let's dive in!
How Flex Slideshow works
The Flex Slideshow offers many layout possibilities which can be used for a variety of purposes. The most straightforward route is to opt for a classic slider. You can make it full width, which works the best for landscape imagery, or a slideshow that displays the visible slides nearby, which is the best approach for portrait imagery.
Another useful approach is to create a Testimonials block. Present your visitors with multiple reviews from your past customers, that can be scrolled through with the help of arrows. Each slide on this block can include an image, title, description, lower title, and button.
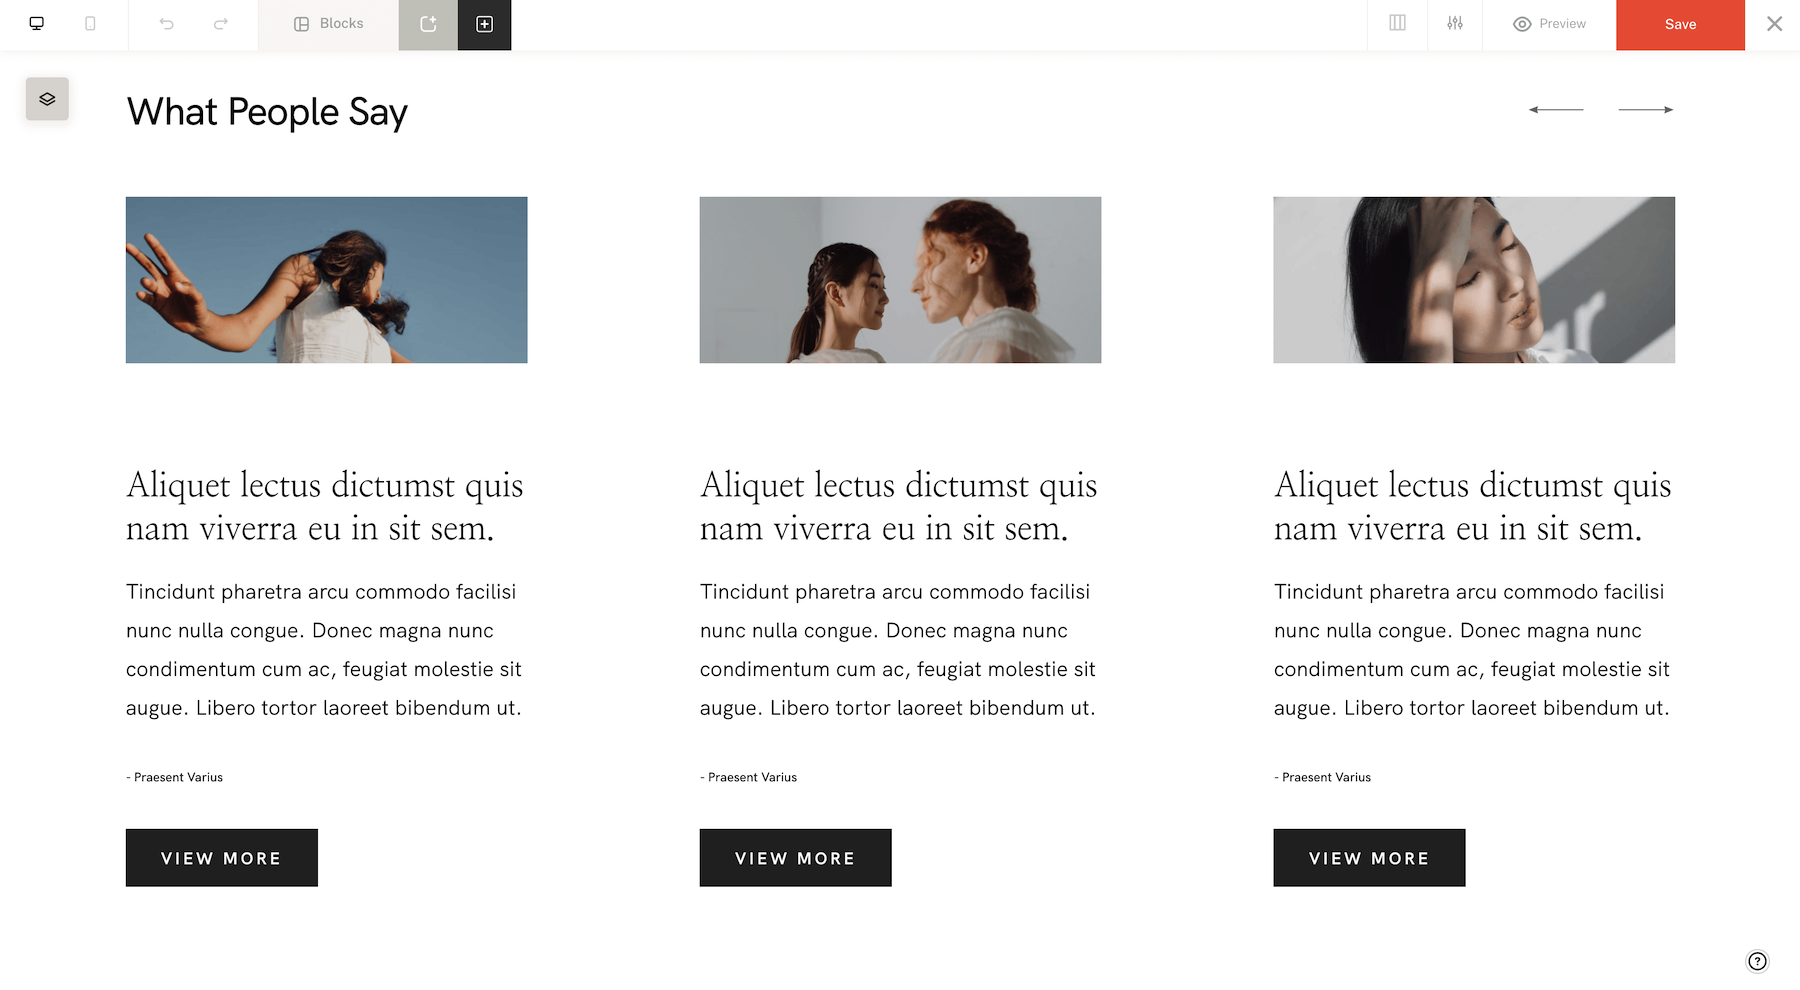 We offer the choice of how your slides can be navigated. You can use either Arrows or the Tabs Switcher, depending on what suits your website better.
The Flex Slideshow offers many layout possibilities which can be used for a variety of purposes. The most straightforward route is to opt for a classic slider. You can make it full width, which works the best for landscape imagery, or a slideshow that displays the visible slides nearby, which is the best approach for portrait imagery.

Another useful approach is to create a Testimonials block. Present your visitors with multiple reviews from your past customers, that can be scrolled through with the help of arrows. Each slide on this block can include an image, title, description, lower title, and button.

Things you need to know before working with Slideshows in Flex.
There are several ways to implement Slideshows into your Flex website:
- By using a pre-built Flex block, available for all Flextheme and Pronto users. They can be found in the Flex blocks library and will be available with the public update.
- Press the "+" sign, select the Sliders/Tabs element, and choose one of the 3 predefined compositions - Slideshow, Testimonials, or Tabs. This will insert a ready layout that can be modified and adjusted to your liking.
- And the one with the most creative freedom, but also most challenging - building your own slideshow. Click on the "+" sign, choose the Sliders/Tabs element, and add the components you need for your custom layout. These include "Slideshow Content", "Slide Text", "Previous Arrow", and "Next Arrow".

Starting with a predefined a composition
Flex Slideshows enable you to present your work in new and exciting ways, turning casual visitors into potential clients. While it offers the possibility to create original and fun layouts, it is quite a complex element. We've included a few pre-made compositions, so you can get started right away and build on top of them. There are 2 compositions waiting for you inside the Sliders/Tabs element - Slideshow and Testimonials.
You will also find a predefined composition for the Tabs element, under the same name.
Here’s how the Slideshow compositions work:
Compositions: Slideshow
The Slideshow composition consists of 3 components - the Slideshow Content, Slide Text, and the Navigation Arrows (Prev & Next).
- Slideshow Content - this component includes the content for each of your slides. It works similar to Tabs, with Items (each Item equals one slide), where you can customize images, titles, short descriptions, and link options.
- Slide Text - this component is in charge of how your text is placed on a slide. It offers to adjust the layout of text inside - its alignment, add/remove buttons, define the font and color of the title and text, lower title, and buttons. Take into account that these options will apply to your slides. But changing the text options of a single slide is still possible, by using the Override Text & Color which can be found in "Slideshow Content", in the "Items" section. The actual text, links, and button labels should be added through the Slideshow Content section.
- Previous & Next Arrows -these should be pretty obvious. If you're making your own slideshow layout, you'll need to add Previous and Next arrows, so your users can easily navigate through the slides. You can also define the styling of the arrows, by modifying their colors, design, and alignment.
Begin by adding your content, through the Items sections, inside the Slideshow Content area. Here you can add images, titles and lower titles, button labels, and links. You can also choose the Slideshow layout, one slide or other slides visible nearby, and play with image shape through the image corner radius.

Once the content is added, move into the Slide Text area, where you can polish the styling and positioning of your content. We added a separate section for content positioning and styling to offer you the full creative freedom to place it anywhere on the slide, giving you full control over the layout design.

Inside the Slide Text element, you can also tweak the layout options - set the alignment options for the text, choose to add/remove the button, define the font and color options for the title, text, lower title, and button. These options will apply to all your slides.
Compositions: Testimonials
The Testimonials composition consists of 2 elements - Tabs Content and Navigation Arrows.

- Tabs Content - if you’ve used Tabs previously, you’re already familiar with how this section works. This is where you add and customize your content, like images, titles and lower titles, descriptions, and link options. You add everything through Items sections, and 1 item equals 1 column, or 1 slide if that's your preference. Individual elements inside an Item, like text and images, can be customized, unlike the design which is a constant across all items as they have the same layout.
- Arrows - You can define the styling of the arrows, by modifying their colors, design, and alignment.

NOTE: Please remember, that the Mobile layout for your composition will need to be built separately. You can do that by moving and rearranging the desktop elements, just like you'd do with any other Flex block.
Building a Flex Slideshow from scratch
Building a Slideshow from scratch offers you the unparalleled creative freedom to create new layouts that fit your website perfectly. You can mix and match the 2 main content elements - Slideshow Content or Tabs Content, navigation elements like Arrows, and the Slide Text element to position the text on slides.
Slideshow Content
Like we mentioned before, this is the section that stores all your slideshow content. It consists of multiple Items, where each Item is a separate slide. This is where you can add and customize images, text, and links for each slide. When you're building a slideshow there are 2 setups you can choose from:
1. Slideshow Content + Navigation elements
Perfect for in-content blocks through which you can offer a quick overview of a recent project, client shooting, etc. These will perfectly complement a blog post.

Like we mentioned before, this is the section that stores all your slideshow content. It consists of multiple Items, where each Item is a separate slide. This is where you can add and customize images, text, and links for each slide. When you're building a slideshow there are 2 setups you can choose from:
Perfect for in-content blocks through which you can offer a quick overview of a recent project, client shooting, etc. These will perfectly complement a blog post.

2. Slideshow Content + Slide Text + Navigation element
This is the perfect choice for the top of page sections, mainly Home and main pages. If you opt to include buttons and links in each slide, you can further link them to your gallery or portfolio page.
 Slide Text
 Slide Text
This element groups all your Slideshow text components like titles and lower titles, descriptions, and buttons, and dictates how they are styled and positioned on slides.

You can use this element when you need to place the text in different positions.

For example, to create a layout like the one showcased below, you would need to have one Slide Text element only the title, and another one with only the description.

This is how you can do it. For Slide Text element 1 - you'll enable the title and disable all the other options (text, lower title, and button).

When it comes to Slide Text element 2 - you’ll need to enable the text and disable all the other options (title, lower title, button).

Tabs Content
