Building your Galleries
Table of Contents:
1. Add a new Gallery
2. How to upload images & Recommended sizes.
3. Image + Videos
4. Managing Global Gallery Layout
5. Global Layout
6. Custom Gallery Layout
7. How to add a gallery to a page or post
8. Changing Parent Slug for Galleries
1. Add a new Gallery
To create a Gallery, go to Galleries – Add New
Putting together a Gallery is pretty simple overall, though many components need to be filled to make it “complete”.
Start the process by adding in the Gallery Title and then proceed to upload images. If you skip adding the Title initially, the gallery Permalink will end up having a number instead of the gallery title like it should. You can still edit the Permalink later on if required.


Add the Category the Gallery is related to. Depending on how you want to list your galleries, categories may not be required. Tags are optional.
Some of the themes include Decorative Images, that are additional design elements located in the gallery header. It’s the optional element even if your theme has it.
Featured Image is a more important element of the gallery. In case you build your Portfolio page using a Listing block (that means you will have a page displaying the gallery covers), you would like to control those images. This is what Featured Image is required for. Another area where it can be used is the gallery header in case you select one with the image.
Once this is all taken care of go ahead and add your Gallery Content: Images or Images + Videos
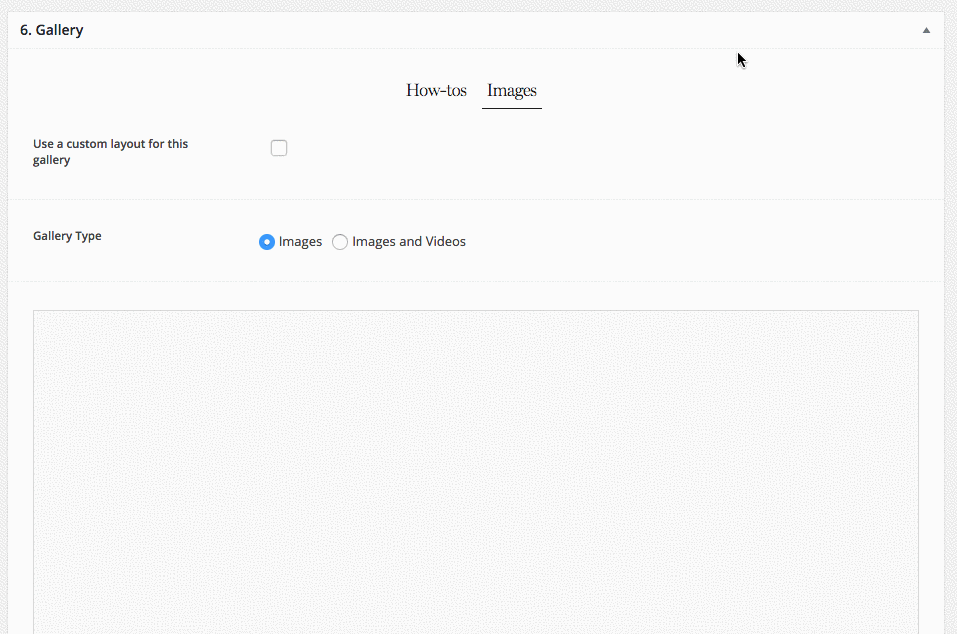
2. Uploading Images
To Upload Images scroll down to the Gallery Type area, make sure you select Images.

Scroll further down and click the “ADD TO GALLERY” button to start uploading images.
Drag and Drop images into the Upload area and click on the “SELECT” button to finalize the process.
2.1 Recommended Image Sizes:
Horizontal – max-width 1500px, jpeg, saved for web, and optimized
Vertical – max-width 1000px, jpeg, saved for web, and optimized
Below we have a short video covering all the basics.
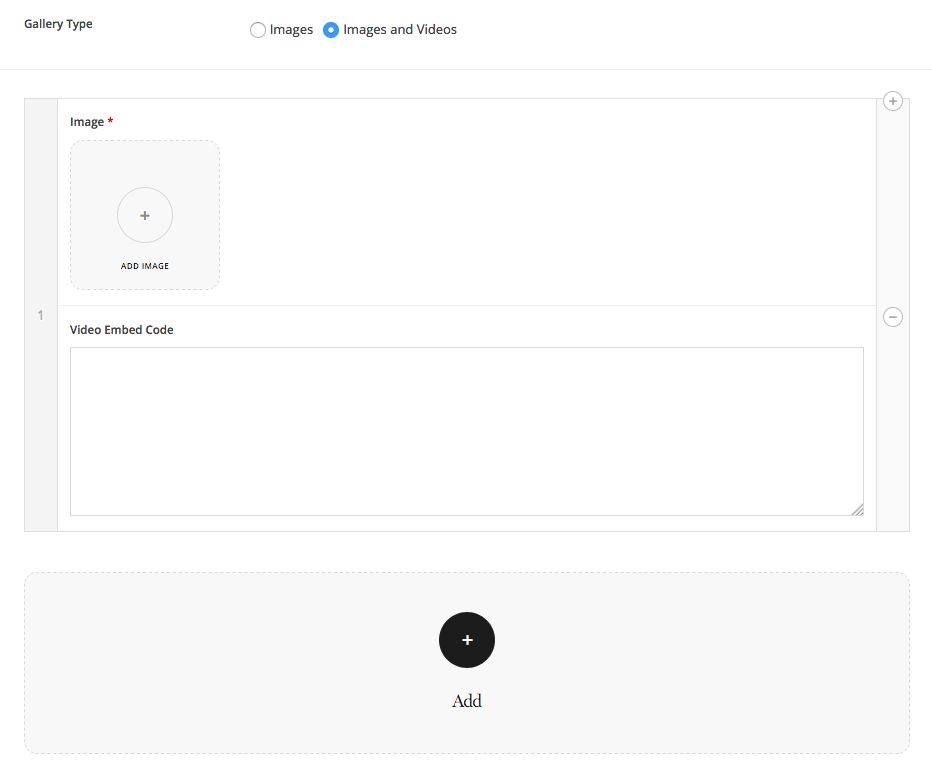
3. Images + Videos
To upload Images + Videos to your Gallery be sure to select the Image + Videos within the Gallery Type section.
From there, proceed to upload images along with video embed codes into the designated areas.
*NOTE – you can bulk upload images just like you normally would, and add video embed codes afterward.
4. Managing Global Gallery Layout
If you are using a Flothemes site, you have two ways to manage Gallery Layouts:
1. Global Gallery Layout – this will be applied to all Galleries throughout the website.
2. Custom Gallery Layout – this will be applied to a chosen Gallery only.
By going to Flotheme – Galleries, you will find an area dedicated to Gallery Layout management.There you will find four tabs:
How-tos – with video tutorials and links to documentation
Global Layout – here you can create your Default Gallery Layout
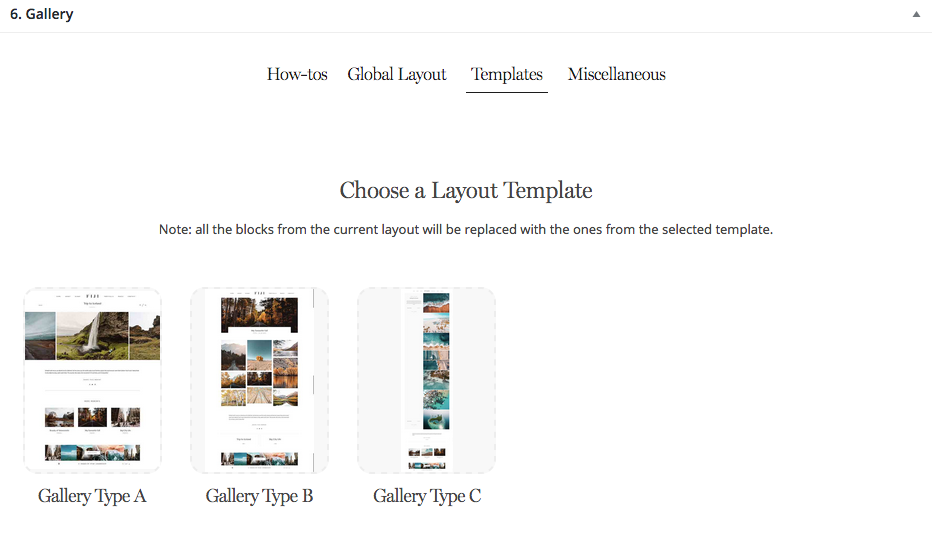
Templates – here you will find all the Pre-built Gallery Layouts
Miscellaneous – here you can change the Gallery URL Slugs
The two tabs we are going to cover in this article are: Global Layout and Templates
*NOTE Galleries that are selected as “custom” within the back-end will not inherit the Global Layout settings.
5. Global Layout
By default, the Global Layout contains one of the templates selected earlier in the Layouts tab.
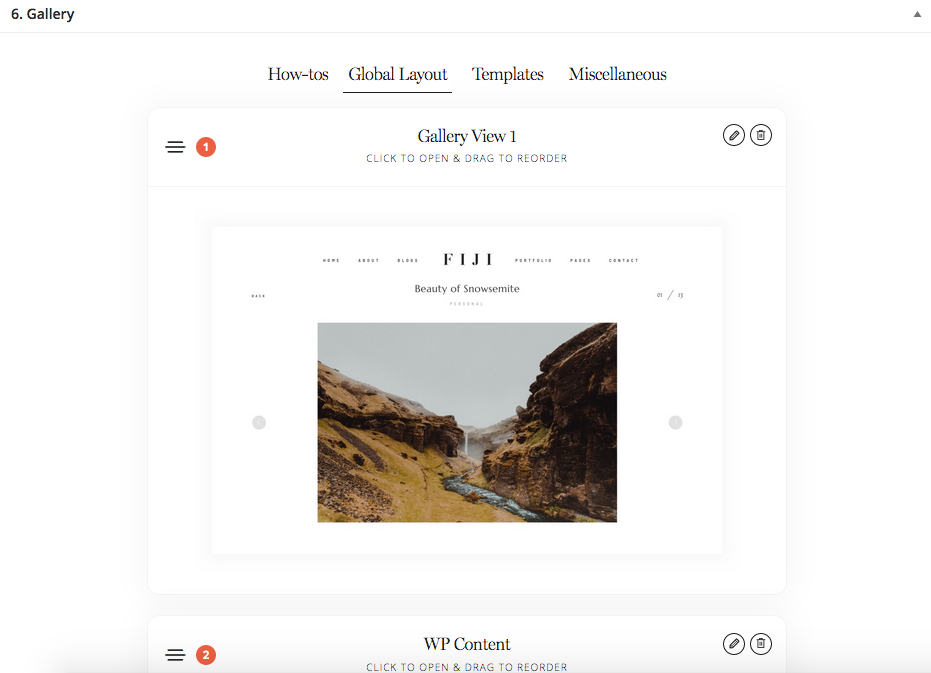
Below we have a short description of the default blocks that may be included in your layout:
- Header Placeholder – includes your website navigation and logo. Having this block allows you to apply a custom header specifically for this Gallery. (e.g. you can apply a more minimal header style to provide more visibility to Gallery content.
- (optional) Item Title – one of the blocks that manage how the top of the Gallery looks like. Usually, we add several options here that you can choose between. If you like the whole template that you applied, but you are not happy with the post header area, you can remove the suggested one and apply another one Item Title blocks (for example, the one that doesn’t use the image).
Quite often, the title is a part of the Gallery View block. In this case, the template will not include the Item Title block. If you build your layout for gallery and want to use Gallery View with the title in it (usually it will be a slider rather than a grid), do not add Item Title block.
- Gallery View – this block includes the gallery slider or grid settings. In some cases, you can also choose to display the header to overlap with the slider image. Other standard options include font and text color adjustments.
- WP Content – this area is optional as many Galleries may use a custom text block. Generally, within Galleries, it is used for text purposes only.
- Other blocks may be included depending on the selected layout. Normally these can include Decorative elements or Page Dividers, various Text Blocks, Social Links, Related Posts, etc.
- Footer Placeholder – just like the Header Placeholder, allows you to set up a Custom Footer if necessary.
For each content block, you can also change margins/spacing between blocks (for mobile and desktop), font styles and background colors, etc.
Once everything is confirmed, click on Update in the top right corner and all Galleries will inherit the chosen layout.
6. Custom Gallery Layout
Our themes provide the option to override the default layout of a single Gallery, keeping all other Galleries at their default settings.
This feature is especially convenient if you want to add a unique twist to your Gallery. Occasionally, inserting a video from a shoot, or a testimonials area can be a nice addition to your post. Therefore, all Gallery Layouts can be customized and tailored to your needs.
To change the Gallery Layout or add more blocks, select “Use a custom layout for this gallery” option.
Go to the Custom Layout tab and make necessary adjustments by adding or removing content blocks.
Once a new block has been added, it will be placed right above the Footer Placeholder. You can drag and drop this block into the required position.
Once everything is taken care of, be sure to save changes.
7. How to add a gallery to a page or post
Your theme has several layouts for the Gallery block, that are called Gallery Views:
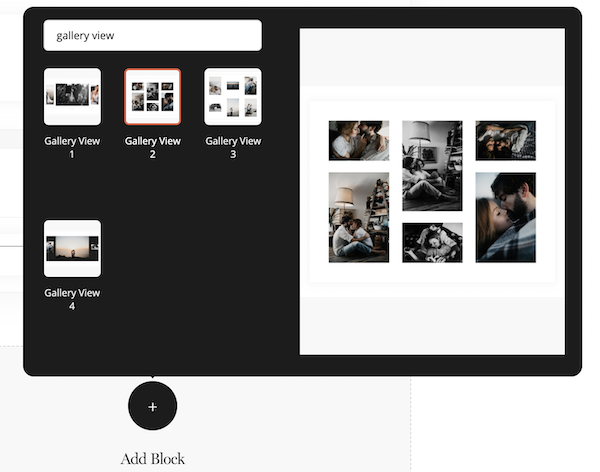
Now, if you want to add a gallery to a page, when clicking on Add Blocks select the preferred gallery layout that your theme provides.
When added to a page, it gives the option to insert an existing gallery or upload images and create a new one:
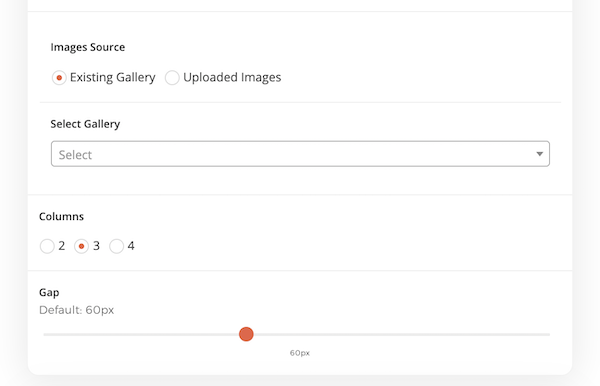
Depending on the gallery layout, there are additional options to customize the gallery view.
If you are adding gallery to a post, select Custom Layout for the post to be able to add additional blocks and then insert the Gallery.
Please check the video that covers all steps of adding the gallery to a page or post:
8. Changing Parent Slug for Galleries
Changing Parent Slugs is a very simple process.
First, go to Flotheme – Gallery – Miscellaneous tab. There you will find 3 fields. Replace the word “gallery” with “portfolio” or any other for that matter, and click Update. This will then affect the website URL Slugs. see screenshots below.


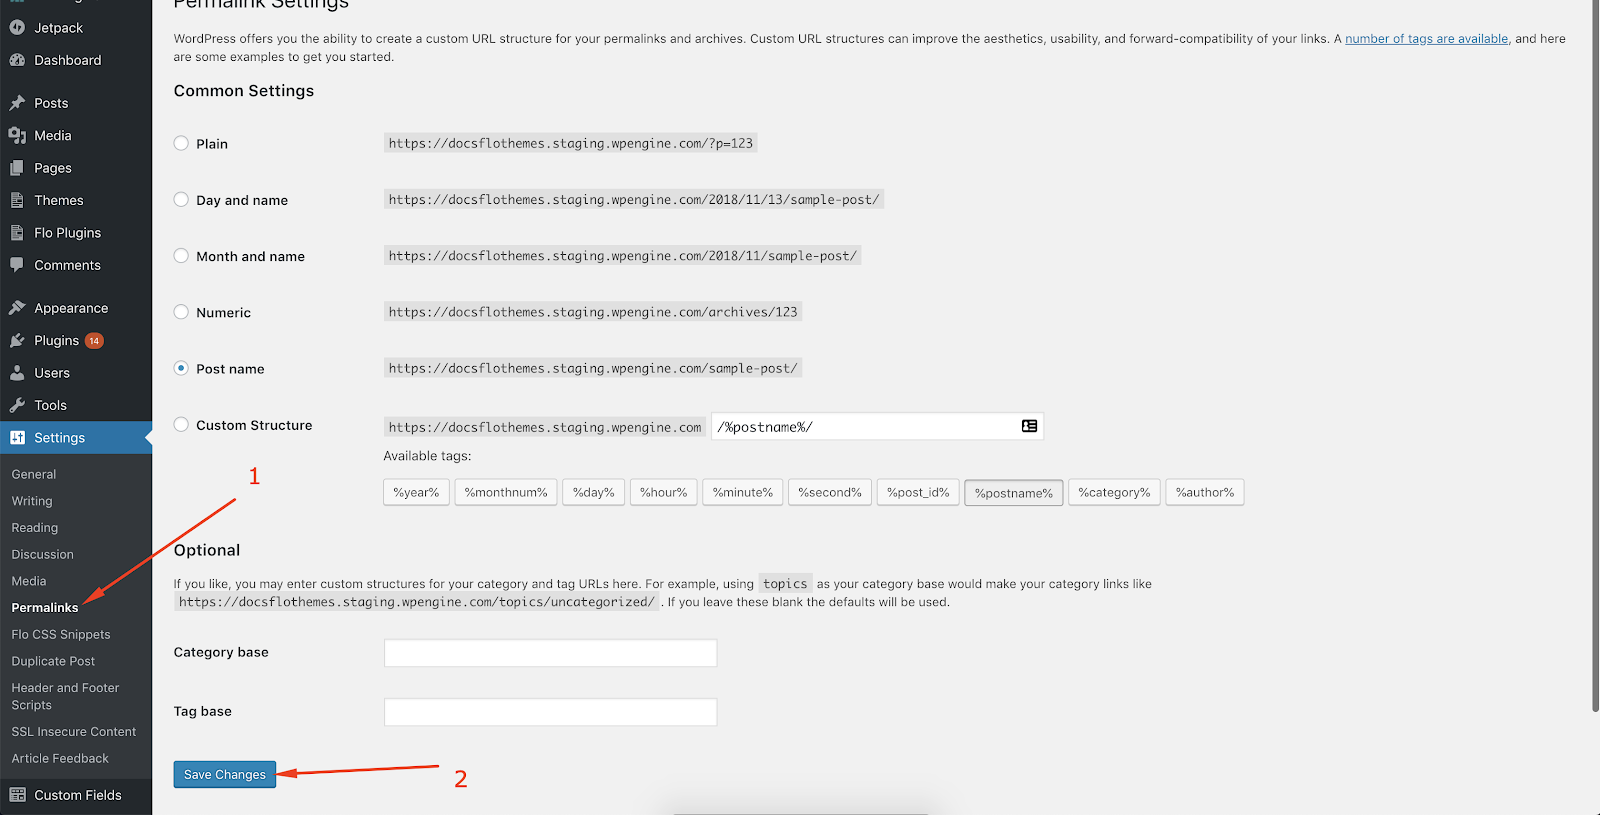
Note that in some cases these changes do not apply until you re-save the permalink structure.
To do that, just head over to Settings > Permalinks and click Save Changes without changing anything: