WordPress Installation
If you already have a WordPress website, we'd recommend skipping this step and moving forward to installing your Flextheme.
Download the WordPress Installation Package
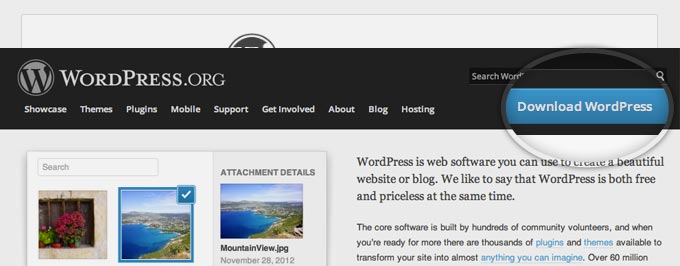
To start the installation process, first, you need to download WordPress from its official download page. We recommend that you always download and install the latest version of WordPress.
Once you click the Download link, the installation package will be saved to your hard disk. Next, locate the installation package that you have downloaded and extract it to a new folder.
Upload the WordPress Files to Your Server
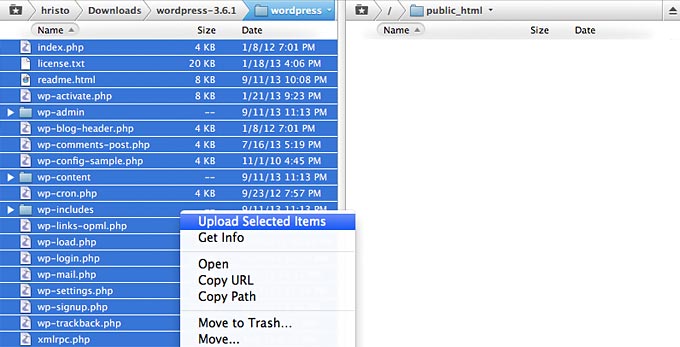
Now, you need to upload the extracted files and folders to your web server. The easiest way to upload the installation files is via FTP. For detailed information on what an FTP is or how to upload files via FTP, you can read more here: FTP Tutorial.
Once the download is complete, extract the archive and upload it to your web hosting account. You can do that via FTP using a client application like Filezilla. If you want this WordPress installation to be your main website, the files should reside in the public_html folder of your account. You can always make a subfolder (i.e. public_html/blog) if you want to run only part of your website on WordPress.
Create a MySQL Database for WordPress to use
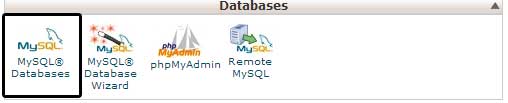
Once you are done uploading WordPress, go to your hosting control panel to create a database. We are using cPanel web hosting, so our screenshots will be of cPanel. In your cPanel, find the icon like this:
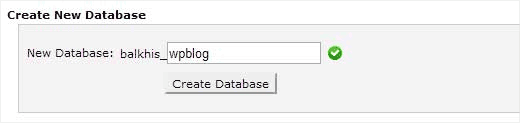
You will see a field to create a new database. Enter your database name, and click “Create Database”.
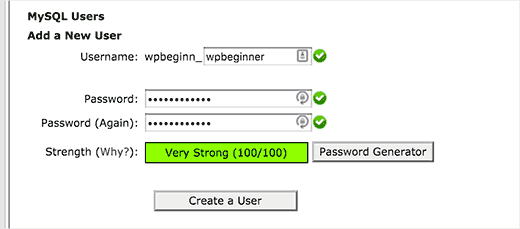
Now that you have created your database, MySQL still needs a username. This username will have access to perform actions on the database.
On the MySQL Databases page in your cPanel account, scroll down to the MySQL Users section. Simply provide a username and password for your new user and click on the ‘Create a user’ button.
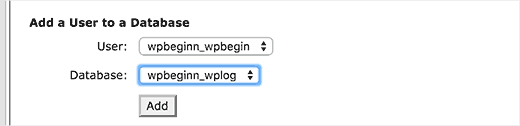
This new user still does not have access to the database you created earlier. For that, you will need to add the user to the database and permit them to perform all actions.
On the same MySQL Databases page in your cPanel account, scroll down to the “Add User to a Database” section. Select the database user you created from the dropdown menu next to the user, then select a database, and click on the “Add” button.
You will be now asked for the privileges you want to allow this user. Select all privileges and click on the Make changes button.
Your MySQL database and the user are now ready, and it is time to run the WordPress install.
Simply go to the URL where you uploaded WordPress. If it is in the main domain, then enter your domain name in the browser window, like yoursite.com or www.yoursite.com.
You will see the language selection page. You can choose a language here so that the rest of the installation is displayed in your language. You can also use English for now and then later change the language.
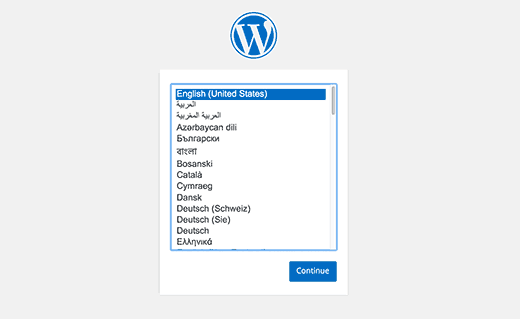
Click on the “Continue” button to proceed.
You will now see some installation instructions. WordPress will now tell you that it requires your database name, password, and MySQL host information.
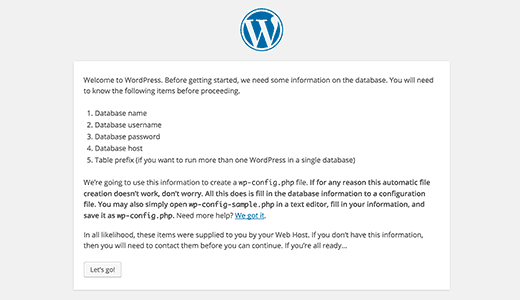
Click on the “Let’s go” button to continue.
WordPress will now show you a form. Now enter the name of the database you created earlier.

Fill in the information and click on the “Submit” button. WordPress will now connect to your database and show you a success message.
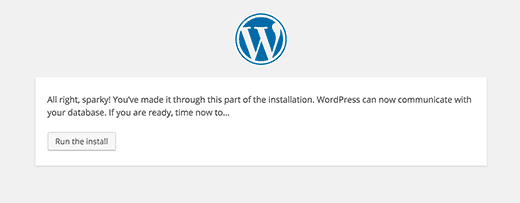
Click on the “Run the Install” button to continue.
WordPress will now create tables in your database and send you to the next step of the installation.
Now you need to provide some information for WordPress to set up your site. This includes the site title, username, password, and admin email address.
If you do not want your website to be visible to search engines, you can check the box next to search engine visibility. If you are unsure about what to do, then simply leave it unchecked.
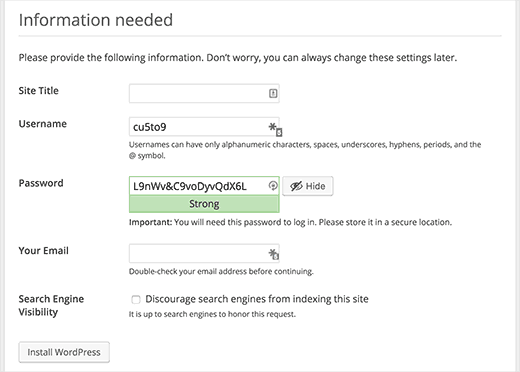
Click on the “Install WordPress” button to continue. WordPress will set up your website and finish the installation.
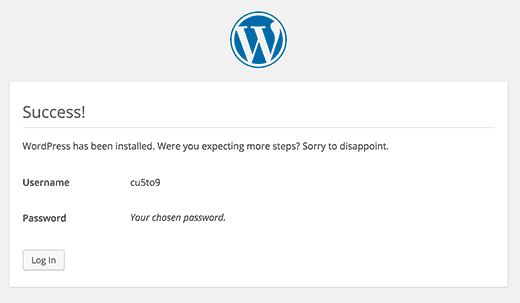
You will see a success message showing your username (save this you’ll need it). You can now log in to your WordPress site.
Lastly, you will need to login into your website's WordPress dashboard. For accessing the dashboard you need to add the "wp-admin" suffix to your website URL unless you have a security plugin that will change this suffix to a custom one.
Your logging link should look something like this: www.yourdomain.com/wp-admin.
NOTE: Also, an alternative way that might be considered is performing this through your hosting provider. The process differs from one to other hosting provider.